We talk so much about our rider’s posture, but what about our own while we teach, standing the arena and moving in the barn day after day?
I’ve been thinking a lot about how I stand and move while doing the same things day after day at home with kids, because when I don’t think about it, I do it wrong and I hurts. It started after baby #1, when my hips and back hurt for the whole year after birth. I read Katy Bowman’s book Diastasis Recti: The Whole Body Solution to Abdominal Weakness and Separation which taught me about correct alignment and movement, and started seeing a personal trainer familiar with her methods who helped me apply the concepts and heal and continue to be strong through being pregnant again. After baby #2 I did the Mutu System which is based on the same principles, and eventually started the personal training again, and I cannot tell you how much faster I recovered and how much better I feel this time around – and now I’m picking up TWO kids all the time!
Yesterday when I went to my horse I noticed how much I’ve incorporated these principles into my whole life, even at the barn. Of course, I got all inspired to do a blog post about it! As usual, this post ended up longer than expected, and there’s lots of additional reading, but I hope this gets you thinking and making little changes toward improving how your body feels in your job so you can keep doing the amazing work you do for a long time!
DISCLAIMER: I am not a professional posture adviser! (aka personal trainer, physical therapist, etc.) So take everything I say with a grain of salt and if it hurts you, don’t do it. If you are serious about getting better at your posture and movement, see a professional!
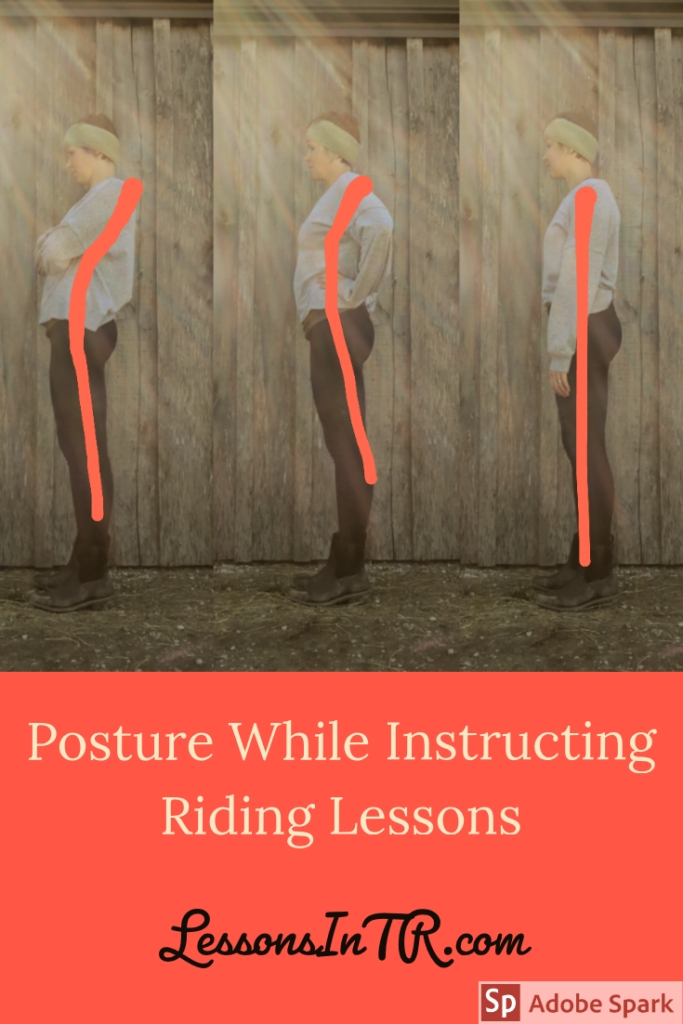
Posture While Instructing Riding Lessons
Posture is important! Instructing horseback riding starts with teaching our riders the correct posture in order to stay in balance with their horses while in motion, so that both horse and rider and move and feel their best. Why not value the same in ourselves while standing there teaching or moving about the barn? Having correct posture while you teach, groom, muck stalls, sit at your desk, and so on will help your body feel better, which can help you teach better by being better able to focus, be comfortable, be happy, and so on – and be less likely to get hurt in the short and long term. Having poor posture will put pressure in the wrong places which over time results in achy backs and knees and wear and tear on our bodies – and using poor posture when lifting heaving loads (think hay bales or mounting riders) can immediately hurt your body.
I’m not going to go into depth here about all the details of correct posture. Rather, I have a few suggestions to make and a bunch of suggested reading if you want to learn more. Here we go!
1. Neutral Pelvis and Ribs
Neutral Pelvis – when standing, tuck and untuck your butt until you find neutral pelvis. Imagine your pelvis is like a bucket of water, you want the water to stay in, not tip out the front or back.
Neutral Ribs – a lot of us arch our back and lift our ribs forward in an attempt at good posture, but we’re actually thrusting our ribs and creating excess tension in the core. Others of us slouch and curve the back, creating pressure and tension in our backs. Imagine your rib cage is like a bell placed table facing down and parallel to the ground, not ringing forward or backward. A common phrase for rib thrusters is to “drop your ribs”. See the post RUA Rib Thruster by Katy Bowman! (This goes for while riding too.)
Stacked – while standing, keep your neutral pelvis and neutral ribs stacked above each other and above your heels. That means not thrusting your hips forward or leaning your shoulders back. A helpful phrase is “stand back over your heels” and “untuck your butt”. Bonus points if you unlock your knees and make them slightly bent! See the Mind Your Pelvis post by Katy Bowman.
FURTHER READING: A really excellent article that goes more into detail about posture and these same concepts and how to check yourself is For a more in depth article about posture and how to self check your own, check out “Things You Can Stop Doing For Better Posture” by Gina Loree Marks CPT-RES (also check out her posts at embodygrace.com. For more detail about these concepts, read Under Pressure by Katy Bowman, and listen to the Alignment 101 video by Wendy at Mutu.
SIDE NOTE: An important factor is the shoes you wear. Wearing heels causes you to thrust your hips forward and lean your shoulders back to compensate for balance changes. Unfortunately, pretty all riding shoes have heels, right?! So try using ones with lowers heels or find some comfortable trail riding sneakers.
Where to apply good standing posture:
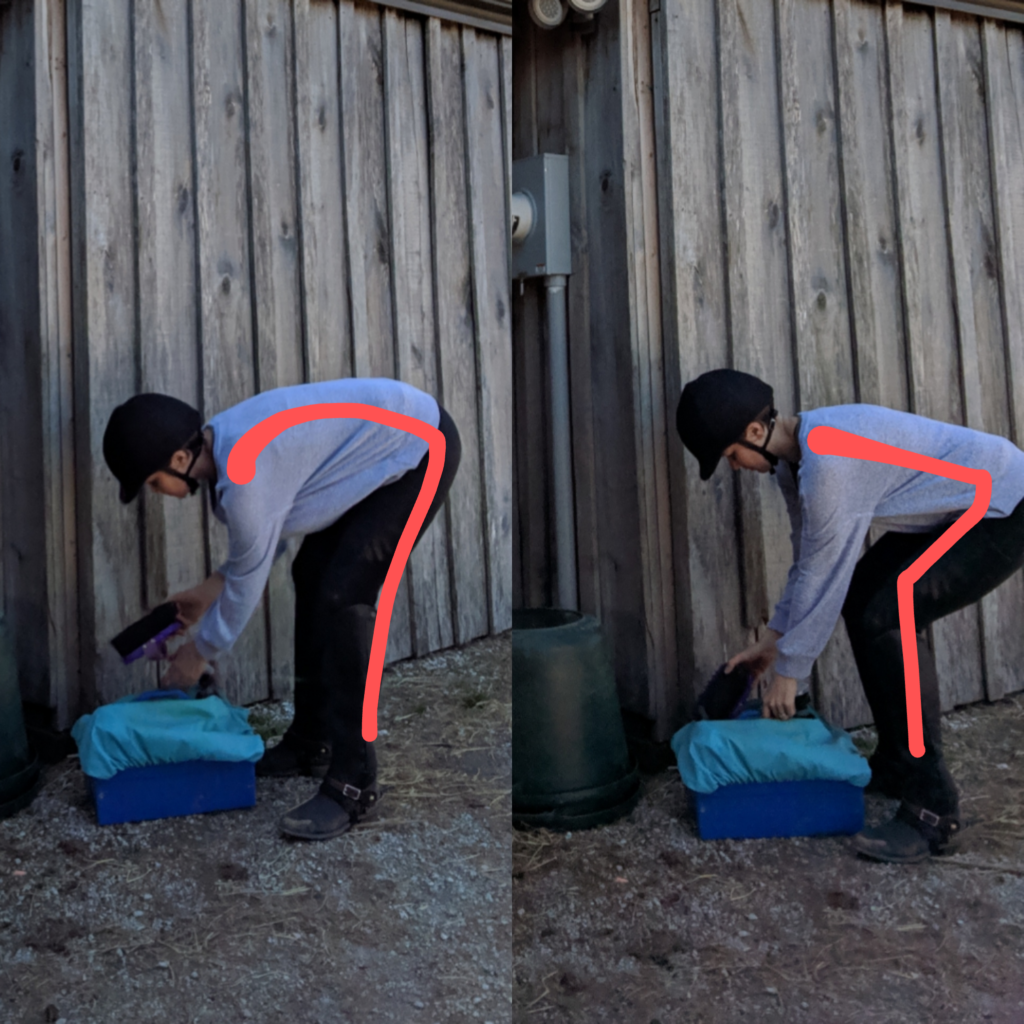
While Teaching
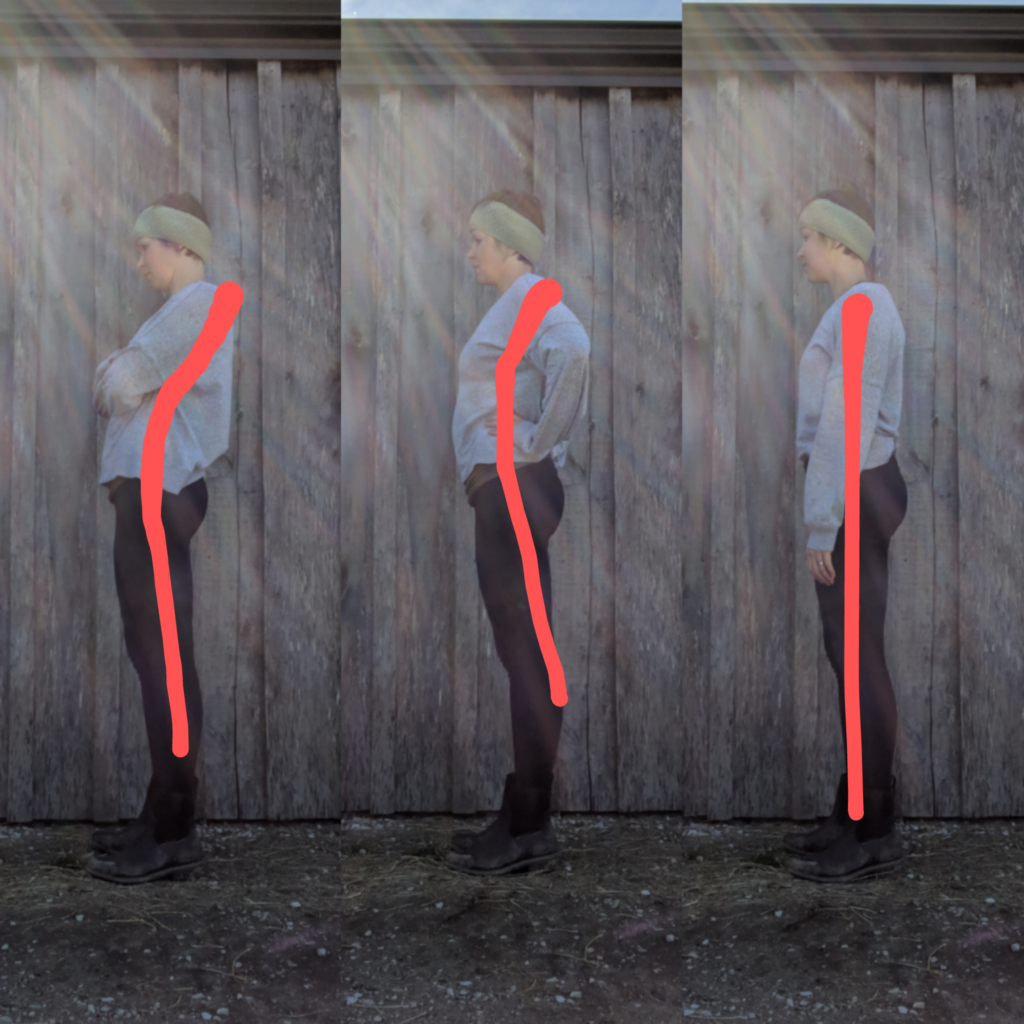
Middle: ribs thrust forward and lifted, pelvis tilted forward, knees locked
Right: CORRECT alignment: ribs down, ribs stacks over pelvis, pelvis neutral, knees slightly bent (wearing heels made this harder than in my flats! also, my head could be further back (not jutting forward) but I don’t have that mobility yet)
How many times do you find yourself trudging along as you teach, perhaps crossing your arms and leaning back, or putting your hands on your hips and arching your back? Start trying to drop your ribs and bring your butt back over your feet.
IMPORTANT: Don’t try this for the first time while teaching!!! Experiment and practice with posture outside of the arena until it making these small changes becomes familiar and habitual, so you are not putting your riders at risk by focusing on your body instead of theirs.
CAVEAT: If you are lacking confidence at instructing, you may want to forget good posture for a bit and try power posing before teaching!
While Tacking Up
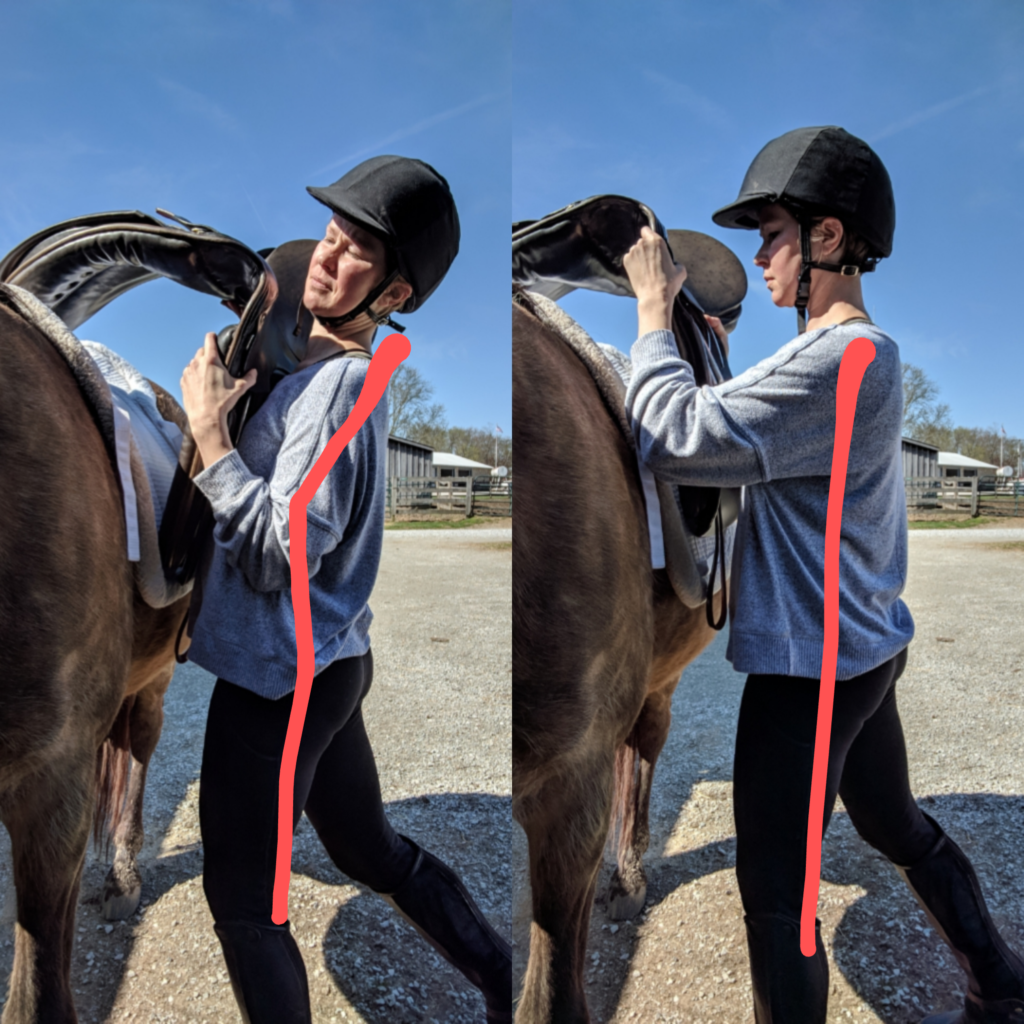
Right: I’m staying aligned because I dropped my ribs and kept them over my pelvis, and, although it’s not marked and kinda hard to see, there is a good line from my back leg up through my body to help support the weight
When putting the saddle on the horse, stay aligned and squeeze your core! Lift with your legs, core and arms instead of your back. Move slowly and in control. It’s better for your body, and if you’re using your body right you’ll be able to set the saddle down more kindly on your horse instead of just chucking it up there and hoping for the best ; ) ! The same goes for your students as they learn to saddle their horse.
While Mounting and Dismounting Riders
The concept and alignment is the same as for tacking, above. Keep good posture and you’ll be able to support the rider’s weight better and keep you both safe.
For a review of mounting and dismounting, see my post about it or these videos.
CHALLENGE: Explain these concepts to someone then have them watch you do it and get some feedback! It’s easy to get stuck into the habit of having the same alignment when tacking, mounting, and teaching day after day, so it may take an outsider’s view to show you where you need to improve.
Bonus: Separate the Ribs and Arms
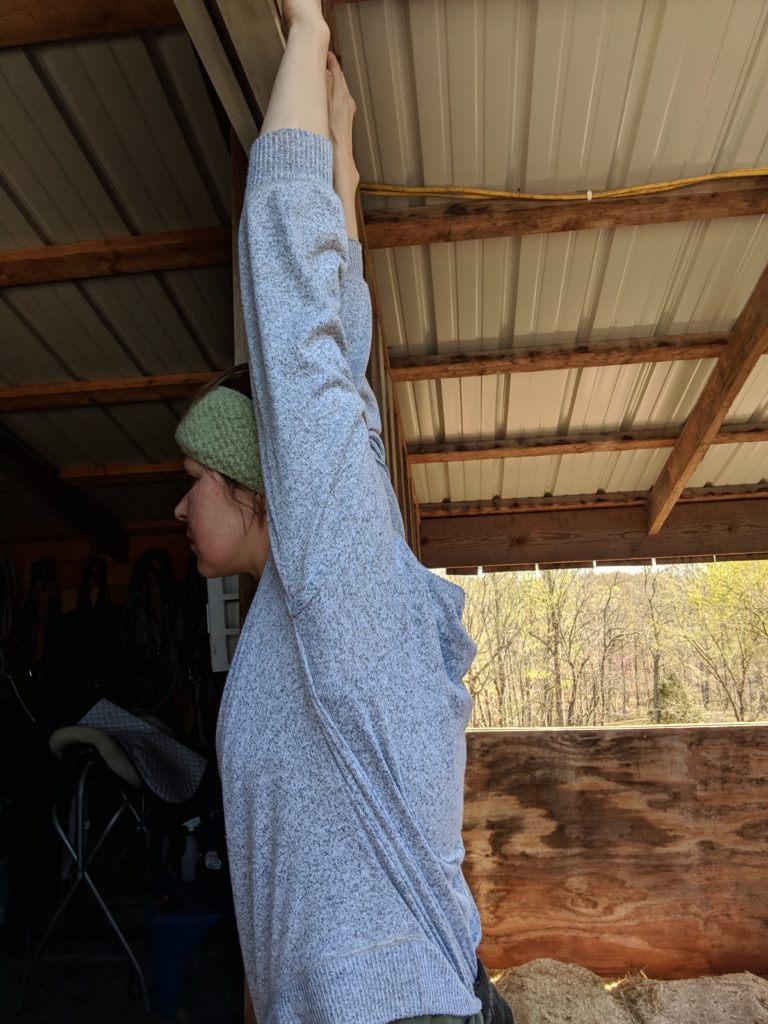
When handing a rider something while teaching, or when lifting a saddle or dismounting a rider, you will be raising your arms. Many people lack shoulder mobility and compensate by lifting (thrusting) the whole rib cage up as the arms go up, instead of separating the two so that as the arms go up the ribcage stays down. When done incorrectly, we arch our back, and the pressures and load bearing goes to the wrong places. To improve shoulder mobility, try hooking your hands on a doorframe or something similar without lifting your ribs. You can apply some pressure to move your arms back to see how mobile your arms are. Do this every time you go through a doorframe and eventually you’ll get more mobility. Note: I may not be the best describer of things – if you’re confused, read Katy’s book.
2. Squat & Bend At The Hips
When you bend over to get something, like a grooming tool out of the bucket, instead of leaning over and curving your back, semi-squat by keep your back straight and bending at the hips and bringing your butt back!
When you squat, remember to keep your knees going at the same angle as your feet. I tend to let my knees cave inward and really have to think about keeping them out over my feet. It doesn’t matter if your feet are close together or far apart, feet pointing straight ahead or pointing out – what’s important is that the knees move in the same direction as your feet are pointing.
Bunny Trail: After going through my whole posture learning curve after baby #1, I realized that most of my back and hip pain was due to bending over wrong my whole life, and especially now to pick up baby! Making this one change (back straight, bend at the hips, semi-squat) has made a HUGE difference in my comfort!
Where to apply good bending over posture:
While Grooming
Right: I’m bending over by keeping my back straight and semi-squatting (much better!)
While Picking Hooves
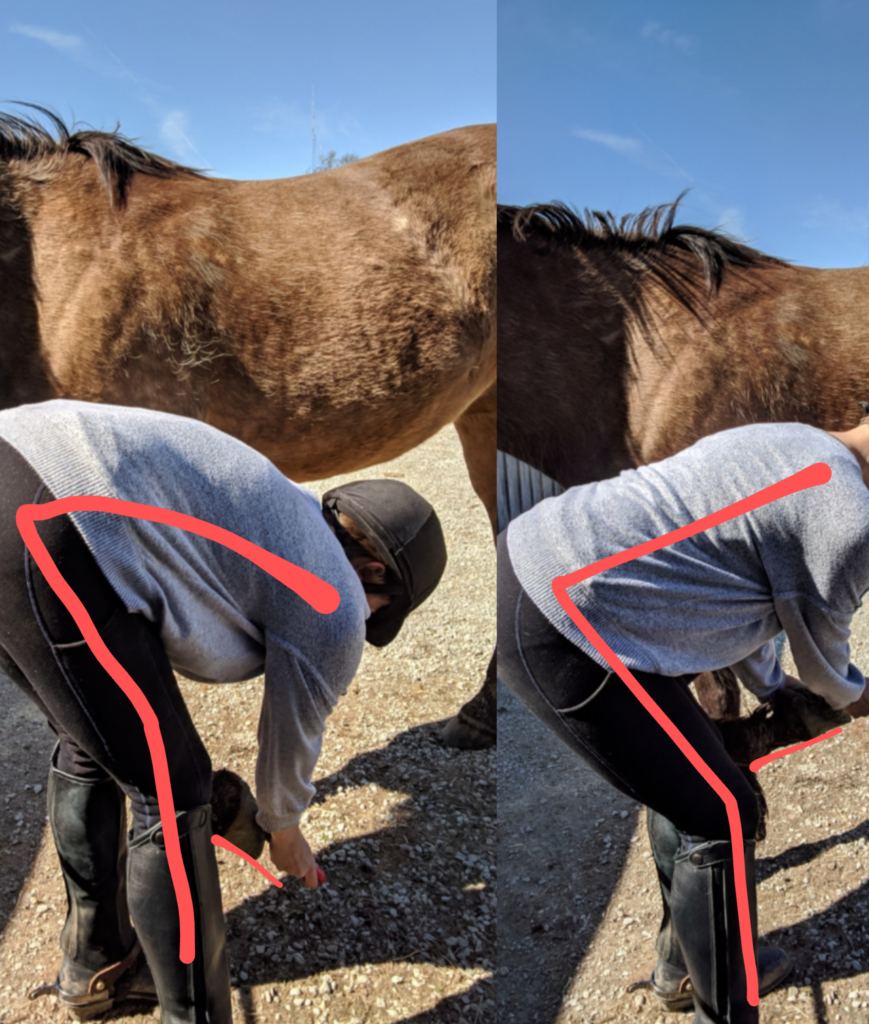
Right: keeping my back straight and bending my hips into a semi-squat while lifting the horse’s hoof higher (I would prefer I hold her hoof at the pastern for her comfort, but I’m selfish and am holding where there’s the least mud!)
Whose back aches after picking hooves? Me 3 years ago: wildly waves hands – me! me! GUYS, this has been the biggest game changer ever. When you pick hooves, keep your back straight, bend at the hips and knees in a bit more of a squat, and ask your horse to bring their hoof to YOU instead of bending over so far to get to a hoof resting on the ground. (Hint: keep asking your horse to pick up his hoof until he picks it up higher – don’t settle for a low rester!) (Warning: your thighs may get a little sore at first from the squat). While holding that hoof, keep your arm straight with a little bend in the elbow, hanging straight from the shoulder socket toward the ground in vertical line, not at an angle or bent, so the weight is supported up through your arms and into your whole body, instead of soley in the bicep. It’s SO much easier!!!
Teach your volunteers this more comfortable way to pick hooves and they will love you.
Also, don’t get so distracted by implementing this posture that you forget about your feet – make sure they stay out from under the horse.
Setting Up The Arena
No pic, but when you bend over or lift poles, barrels, or anything, keep the straight back and squat! Breath out when you lift and squeeze your core. ‘Nuff said.
3. Stay Aligned While Sitting
Some of you are up running around the barn all day, some of you are sitting at a desk a lot. For those with lots of desk sitting, think about your posture there, too. Basically, sit on the edge of your chair and find neutral pelvis and neutral ribs and stack them on top of each other.
Two really good articles with pictures and explanations and more ideas for how to sit well and switch up the ways you sit are “Sitting” by Heal Endo and Like Mother Like Daughter’s Review of Mutu.
Or, dare I say it, consider floor sitting? Or standing? (I totally just transferred to sitting on the floor at the coffee table instead of sitting on the couch to finish writing this!)
If you want to learn more about creating a dynamic work environment, check out Katy’s book Don’t Just Sit There.
4. Switch It Up
Perhaps most important is that you don’t get stuck in one posture for a long time – switch up how you are standing or sitting or moving OFTEN. It does you no good to find “good posture” and then just stay there for a long long time all stiffly. Katy Bowman’s whole take is that movement is a type of nutrient our body needs and there are lots of little different ones we can use correctly to feed our body throughout the day instead of sticking to the same few positions – for her whole excellent take, see the video on this intro page.
For example, the past few years I have been carrying babies a lot, and the best advice I got about baby carrying was to switch it up a lot, don’t get stuck in one position.
So, while teaching, switch positions! Stand with your feet wide, feet narrow, slightly lunged, etc. Walk around. (Idea: do some side stepping, because as riders we use our legs in the squeezing direction a lot (around a horse’s body), so do the opposite and use the outside muscles of your leg to propel yourself sideways and work those muscles the other way to get a good balance. Obviously if you’re not used to coordinating this, don’t start out while teaching!)
While you’re at the desk, switch up how and where you sit.
5. Little Changes and Listen To Your Body
This may seem like a lot of information and I don’t want you to be overwhelmed. Make little changes – squat just a little more, drop your ribs a little more, notice how you move and sit and stand.
The book Mini Habits talks about how our bodies don’t actually react well to huge changes, it’s better to make little changes that it doesn’t notice that slowly make better habits. For example, if you start squatting all the time your body might rebel and say it hurts! Stop! So just do little squats, then a little more, then a little lower, and so on.
And listen to your body. If something doesn’t feel good or hurts, stop it. See a professional.
Speaking of professionals, it was so helpful to me to start seeing a personal trainer who put my body in the right positions and taught me better ways to move it. It was very empowering after having a baby and losing most of my core strength to be able to practice correct posture away from home and with weights, so that when I had to carry a car seat or pick up a baby at home I felt confident in my body and knew, “I did this at PT with a 30 pound kettle ball, I can lift this 20 pound car seat easy.”
Conclusion
I’m running out of time and must bring this to a close. I hope you found that helpful and inspiring, not overwhelming!
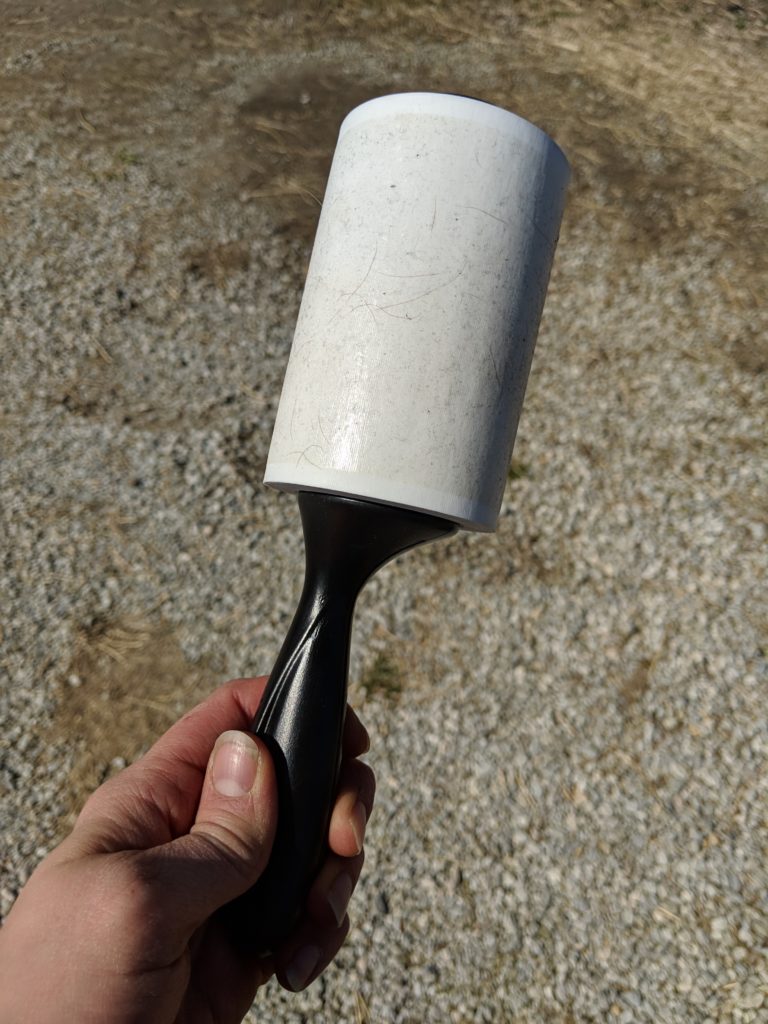
In other ideas, get your volunteers deshedders to use before leaving the barn this shedding season and they will love you. I love myself for getting one for myself that stays in the car!
And in other news, I got to be PATH Intl’s Member of the Month! At the time I thought it would be fun and perhaps could promote the blog, then was so sleep deprived I forgot to include anything about it, lol. I’m so annoyed at myself! So if you wondering if that’s me…it is. Also, I feel bad I said I work at PALS when I have’t for over a year due to babies…at the time I thought I’d be going back sooner. Anyway, I think it’s a super fun thing PATH Intl doing and am honored to have been featured!!
Happy Teaching!
****************
Note: This is not professional advice, this is a blog. I am not liable for what you do with or how you use this information. The activities explained in this blog may not be fit for every rider, riding instructor, or riding center depending on their current condition and resources. Use your best personal judgement! If you would like to contribute an activity or article, please contact me here, I would love to hear from you!
This is an awesome topic! When I first started volunteering years ago, I had bulging and protruding discs. I was so careful to do the squat and suck in the gut, and no twisting. All your suggestions really will help! Thank you for all the links.