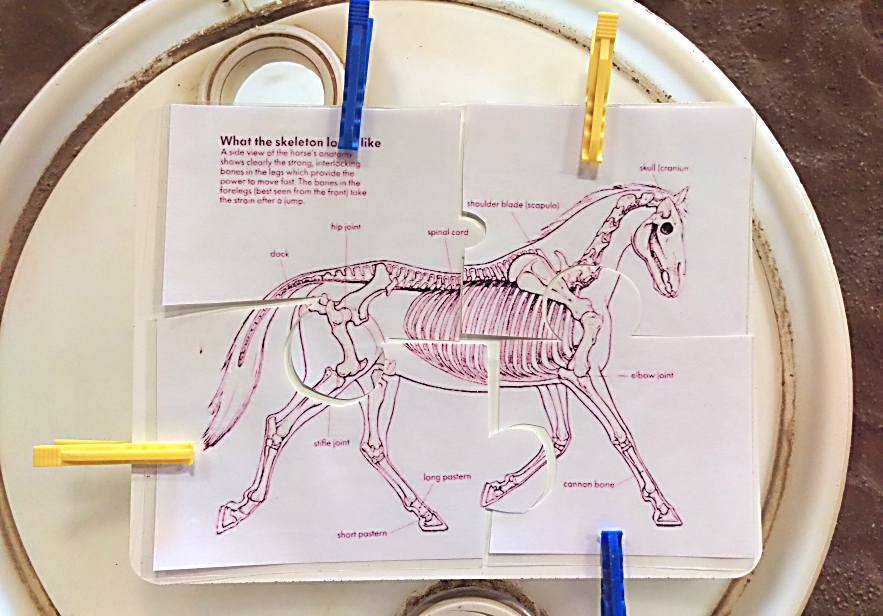
The other week I used this puzzle to show my students what a horse skeleton looks like and teach them some new parts. I think I made it for Halloween and never used it…so we’re doing it in the spring! Anyway, they always like the puzzles!
Puzzle Game
- “Hide” the puzzle pieces around the arena. I used clips to attach them to the arena letters, cones, and hang them off rings on poles.
- Have the rider search for the puzzle pieces. When they find it, they can use their fine motor skills to attach the piece to their horse or saddle with the clip (make sure the horse is used to this before the lesson), or choose a sidewalker to hold it (practicing passing objects), or bring it to you. I encourage my riders to first ride around the rail, then explore the inside of the arena. During this time they should work on a specific riding skill such as halt, walk on, or steering.
- When the rider has found all the pieces, halt and put the puzzle together. I had them clip the pieces to a small white board (seen in the pic above) that I held on the horse’s withers. If they put a piece in the wrong spot, I did not correct them right away but let them keeping working to figure it out themselves, then if they needed a hint I helped out (this can be a struggle for some volunteers!).
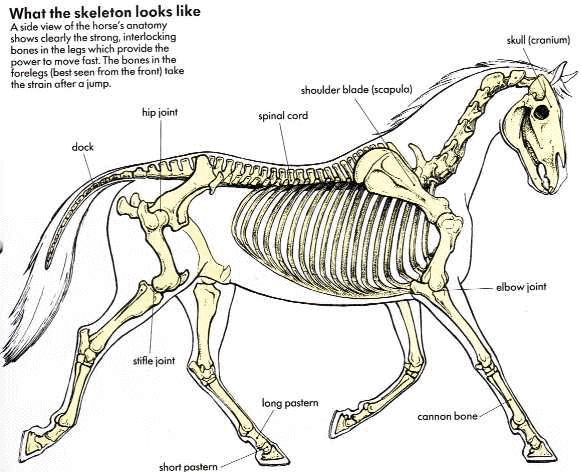
- Discuss it! Ask, What is this a picture of? Point out where the rider sits, on the ribcage. Teach some new horse parts. I especially like the picture I used because it has only a few parts on it so it’s not overwhelming..
How to Make the Puzzle
- Find and image you’d like to use. (I search google and click images. I used this image here from Circle R Ranch, or would recommend this image here.)
- Copy it onto a word document. (On google click the image, click “view image”, right click the image, click copy. Open a word doc, right click, click paste.)
- Make it the size of the paper. (Click the image and use the corners to resize).
- Print it.
- Laminate it.
- Cut it into puzzle pieces. (I made 4 pieces).
Enjoy!
****************
Note: This is not professional advice, this is a blog. I am not liable for what you do with or how you use this information. The activities explained in this blog may not be fit for every rider, riding instructor, or riding center depending on their current condition and resources. Use your best personal judgement!